Live data is now available from multiple smart phone based sports tracking applications. The applications are developing rapidly and are used by thousands of enthusiasts but they aren't currently used by the AIS or ACTAS. When I ask why, I'm told they are keen on live coaching but its only a novelty without power data. Our solution provides live SRM power data, which hopefully will help get live coaching happening at the AIS and ACTAS.
Google's live tracking at the 2010 Tour de France used the open source android app, My Tracks and we've stuck with that, providing a bridge application to control My Tracks and upload extracted data live to an existing web based sports training application. Unlike many of the conference participants I'm fond of toys but I'd be the first to agree there's a gulf between a new toy and changing how things are done. The challenge now is to bridge that gulf.
 |
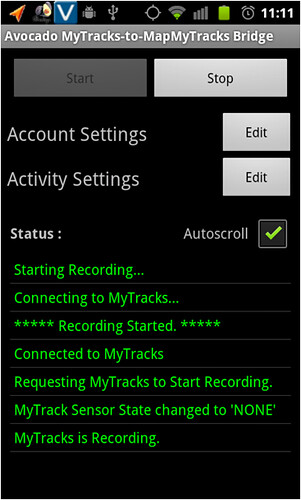
| Interface of the Avocado MyTracks-to-MapMyTracks Bridge. It controls My Tracks and uploads live training data to Map My Tracks. |
Avocado MyTracks-to-MapMyTracks Bridge Setup and Running Instructions
What
you need to run the application:
1.
Android
2.1 update 1 or above.
1. Avocado MyTracks-to-MapMyTracks Bridge is available for download. This version will upload SRM PC7 data except for power data. A version that also uploads power data can be provided by email on request.
2.
An
account on the website www.mapmytracks.com
3.
Latest
version of Google MyTracks obtainable from the Android Market.
Note: If you are interested in using an
SRM PC7 to track power data you will need an ANT+ capable handset. Also, at this time the version of Google MyTracks (1.1.10) available on
the Android Market isn’t able to connect to the SRM ANT+ Bridge. Use this My Tracks version instead.
How
to setup the application:
1.
Turn
on “Unknown sources”. You’ll find it in Android Settings >> Applications.
This will allow you to install applications from sources other than the market.
In this case, from the distributed APK.
1. If you are using Android 2.2 or above you can click on the install button while viewing the email with the Avocado MyTracks-to-MapMyTracks Bridge app attached from within the Gmail app. For Android 2.1 you need to log in to Gmail through the browser to download the app.
2. To install downloaded apps run the downloaded APK file either through the downloads in the browser or through a file explorer (it
should be downloaded to sdcard\downloads).
4.
When the first run, the bridge application will ask you for the username and
password. You should enter the MapMyTracks username and password. This will
allow the bridge application to upload data to your account in MapMyTracks.
Note: Authentication of the MapMyTracks
username and password won’t occur at this point, but rather it will occur when
you start an activity. Hence you won’t get to find out whether or not the
username and password are valid until when you attempt to start an activity.
This will be changed in a future version.
5.
The
bridge application will also ask you for activity details, these can be changed before every activity but experience suggests this is too much effort.
a.
The
title is the name you give to the activity
b.
You
can specify if the activity is public or private. Public allows everyone to see
the activity details. Private activities are only available to you.
c.
Select
the activity type from the list.
d.
Add
any tags you may wish. The tags group activities and make them easier to find.
E.g. you can place tags for the event you are using, the team you are playing
for, etc. Other people, can then find all the activities with the given tag,
including yours.
6.
Sharing
and access to third-party applications needs to be enabled in MyTracks. You’ll
find the setting in Settings >> Sharing >> Allow access. This would
allow the bridge application to control MyTracks (turn recording on and off)
and retrieve sensor information (e.g. heart-rate data) from MyTracks. Make sure
this setting is turned on before starting an activity.
When
you begin your activity:
1.
Make
sure you have your sensors configured in MyTracks (e.g. your heart-rate
monitor). You can go to “Sensor State” in MyTracks to check if the sensor
details are coming up or not, even before recording.
2.
Go
to the bridge application. It should be titled “Avocado MyTracks-to-MapMyTracks
Bridge” in your application menu.
3.
Press
the start button.
4.
Before
you start moving, wait until:
a.
You
get a GPS fix. This ensures that your whole activity is recorded.
b.
You
start seeing “Uploaded XX:XX:XX” with timestamps coming up on the “updates”
portion of the screen. This means the application has started uploading your
data. When this happens, others can see your updates live online. Currently,
there is a lag of about 5-15 seconds between the activity and the online updates.
At
the end of your activity:
1.
Go
to the bridge application and press the stop button.
2.
You
can view the offline details of the activity in MyTracks. Notice that the
GPS location samples in MyTracks are not the same samples used in the online version at present but we are planning to change this.
Interesting - I have a similar ap that I have written myself that works with our own web servers and software.
ReplyDeleteI think it will have an impact on how coaches manage their clients. My ap also has a self contained mode where the ap "speaks" to the rider like a coach would, as well as reporting HR and Power data via the ear piece.
ReplyDeleteLovve this
ReplyDelete